Where or where has deco-pages gone? Does anyone else out there use deco-pages.com? I post in the gallery there and I can't connect to their site. I am starting to get paranoid and I hope their server will be back online soon. Any news anyone??
Now for the freebie! I don't know where all this creativity is coming from, but I have a theory! My husband recently asked me to stop playing all Facebook games. I played Farmville for a long time, then I quit last summer. Then I started playing Fashion World and one like civilization. But I quit back in September or October. Since then I've had a lot of extra time for stuff around the house, my traditional scrapbooking, my digital scrapbooking and of course creating freebies. I found the grayscale templates for these flowers on the microsoft clip gallery quite awhile ago and I have had them on my desktop staring at me for ages. So last night I decided to do something with them. There are 11 flowers and 4 stems in the set. I added the shadow for the preview but not to the png files. I also left the grayscale originals in the folder for you if you needed to make a flower or two in a specific color. Just add a layer over the flower of your choice and adjust it, most of these are set to Multiply or Screen, but on some I used Dodge or Color in my photo editor. I don't use Photoshop so I'm not 100% sure of the lingo to explain it to the rest of the world. Here is the result!
You can download the flowers here.
Remember, leaving me some love is free!
Monday, November 15, 2010
Sunday, November 14, 2010
Little Stamp Ornaments Freebie tonight.
I'm just on a freebie roll! I was working away on my traditional book today when INSPIRATION hit me. I am working on last year's Christmas layout. I decided to make a free form Christmas tree out of a green yarn stitched onto the page. Then I wanted some sort of ornaments. I was looking around at my collection of odds and ends and I came upon some old Christmas postage stamps. Now what to frame them out with?? I found some little tiny paper stars that I'd picked up on eBay for a 4th of July page. I used some ModPodge (best stuff ever!) to decoupage the stamps onto some white cardstock and then the white and red stars onto them as frames. The only drawback was that I had a hard time framing out the best parts of the stamps with the star's shape, like on the stamps with Mary and baby Jesus, it's hard to get both into the center of the star. They dried very quickly, so I cut them out and to dress them up I wrapped a little bit of decorative wire around them. I also used the wire to "hang" them from the tree on the paper. I wish the layout was complete, I can't share it with you until it is!
In celebration of this wonderful idea, I've created basically the same thing for you, except that I warped the stars a little when I wanted to get a little more of the picture into the frame, and I made them with glitter. Oh, and just because I love you all so much, I made 4 Love stamp ornaments. These are made with scans of actual stamps, some are American and some are foreign.
To download the ornaments, please click here.
Labels:
Brainstorm,
Christmas,
Digital Scrapbooking,
freebie,
winter
Saturday, November 13, 2010
How to display postcards in a scrapbook album & Cluster Frame Freebie!
I have been working away on my scrapbooks trying to get caught up. Christmas is coming and I try very hard to have the books ready to take home to show to my family back in Nebraska. I had a lot of fun with the vacation album from our family trip to the Black Hills this summer. I bought an 8x8 album and printed wallet sized photos for the pages. Then my main souvenirs were postcards. I agonized about how to put the postcards into the album without using page after page in the book. One day at the dollar store I found acid free clear document envelopes. They were perfect! I was able to put the postcards into the envelopes, sometimes without any trimming, sometimes with just a tiny bit, then I was able to "stack" them.
In each envelope I put 1 postcard, or if I had a lot of them, as I did at Mount Rushmore, I put 2 in (be sure the back one will be upright when you flip it up), then I cut a piece of coordinating cardstock to go above the postcard(s) in the envelope. I used the cardstock because I didn't want to put the brads through the envelopes without something to strengthen the "hinge" joint. I didn't use it as a titling option, but this would definitely be a good place for it! Then to make sure the postcards were placed straight onto the album pages, I measured and punched holes on the cardstock background paper - and if it wasn't very strong, I backed it with a stronger cardstock just in case - that way they postcards wouldn't be hanging on the page protectors. Here is what my finished pages looked like:
I had a lot of fun with it, I hid journalling and souvenirs under the postcards and on my favorite layout about the scenic drives in the hills, I put a picture of my girls sleeping in the back seat of the truck, their mouths wide open in exhaustion. It's a fun surprise and too funny to let them forget. I did learn 1 lesson though. When on vacation, journal every day on your postcards so you don't have to do that part when you put your books together! I didn't do it this time, but believe me, I will next time!
So anyway, that took care of my memories. So what to do for the girls? Well, when I was printing my little wallet sized photos, my printer ran out of blue ink and a bunch of pictures printed pink-tinted. I left them in the pile of clutter on my desk and forgot about them until the end of the project when I was cleaning up and planning to move on to the next big thing. Then it occurred to me that I could use them and have fun with them! So I found some pretty paper, black with pink and blue butterflies on it and I scrapbooked the pictures that featured my younger daughter. The journalling reads, "The best vacation memories are rose colored." I'm proud of it, a mistake that turned out really sweet!
For my other daughter I had to do more. I wanted to do a digital layout for her because she took so many pictures herself on the vacation - she earned her digital photography patch for Girl Scouts on the trip! But rather than make page upon page of vacation pages for her, I thought I'd put together some cluster frames and put the best pictures of her and taken by her on the trip. Here's one of them:
If you'd like to use some of these frames for yourself, you can snag them below. There are 7 in the set. I made them to fit a 12x12 page.
To Download Frames, click here.
Labels:
Frames,
freebie,
Traditional Scrapbooking,
Vacation
Thursday, November 4, 2010
Sparkly-Pink Alpha Freebie
Well I was working on my daughter's birthday page for her 4th birthday and I needed a sparkly-pink 4. I decided that I'd have to make my own, and once I decided to do that, I figured should make the whole number set. But then it occurred to me that I should also make the alpha and of course I had to add some punctuation. So anyway, here you go.
As I said, the set contains the numbers 0-9, the alphabet A-Z and the font I used (Santa's Sleigh Full Deluxe) had the exclamation point, question mark and period that fit with the style I was creating. Please enjoy! Click here to download.
Saturday, October 30, 2010
Girl Scout Scrapbooking Set Freebie! 2 Pc Download
I received a comment yesterday that I should break my GS set into 2 pieces to make for easier downloading. So here are the new links. I apologize, I never thought of it.
Download the Embellishments here.
Download the Papers here. Use the password: sodigitallyme
Download the Embellishments here.
Download the Papers here. Use the password: sodigitallyme
Labels:
alpha,
Digital Scrapbooking,
freebie,
Girl Scouts,
wordart
Friday, October 29, 2010
Girl Scout Scrapbooking Set Freebie!
As many people know, I am a Girl Scout Leader for my daughter's troop. It's one of the biggest joys in my life. I absolutely love the experiences I'm able to provide to my daughter and her friends. And it's all thanks to the founder, Juliette Gordon Low. In honor of Juliette Gordon Low's birthday (October 31st), I am releasing a Girl Scout Scrapbooking set. I tried to include all of the levels of Girl Scouts, Daisy, Brownie, Junior, Cadette, Senior, Ambassador & Leader. Not all items are shown in the preview. Drop shadow are for preview only.
This set includes:
14 coordinating papers, 12x12
14 coordinating distressed cardboard frames
A-Z alpha set
7 Bridging-related items
3 word art
4 cards
2 Juliette Gordon Low picture charms
Bronze, Silver & Gold Awards
You can download the set here.
Please leave me some comments or send me the layouts you make with the kit, I'd love to post them for others to see!
Labels:
alpha,
Digital Scrapbooking,
freebie,
Girl Scouts,
wordart
Friday, October 15, 2010
Tuesday, July 13, 2010
Spice of Life Freebie!
As many of you know, I work at the local library. One of the perks of the job is getting to look at all the books donated by people cleaning out their basements and attics. Now going through boxes of old books isn't always as glamorous as it sounds. For example, one Friday I picked through a box of books, trying not to touch them because they were so dusty and mildewed (some people just cannot throw books away). I decided none were salvageable and left them for the janitor to throw out on Monday. When the janitor came in on Monday he kept hearing a scratching sound...he checked in the box and there was a live mouse in it!!! But, once in awhile I stumble on a really great treasure, as I did today. This fun little book of funny quotes was titled, The Spice of Life. It has no author or illustrator listed, but it is full of wonderful bird themed doodles. This freebie set includes 24 bird doodles and 2 frames made using my favorites from the doodles. All are .png files. Please enjoy!
To download, please click here.
Tuesday, June 29, 2010
Freebie Baking Overlay
Another freebie, yay!
I started a new scrapbook album and I decided that the title page should be a recipe scrapbook page with pictures of me making cookies with my two girls. But, how to scrap it and make it look really special -- my title pages are always very detailed and I put a lot of thought and work into them. Knowing that I wanted to scrapbook the recipe, I decided to print a recipe card that would look retro and really very fun. Here is what I came up with:
I found the graphic of the "chef" online and then I spent 2 days searching for a 1950s retro frame. I could not find one! So I experimented with the warping tool on my photo editor and came up with this frame. I think I accomplished my goal. To finish off the effect, I downloaded fonts from daFont mainly the title font called, Fontdiner.comSparkly.
Here is the .png file that can be used as an overlay for a digital page or printed on paper for traditional scrapbooking. I printed mine on 5x7 tea-stained paper. I was trying to make it look well worn and a little shortening/butter stained like my mom's recipe cards always were.
Click here to download. Please leave me some love if you like my work, and please enjoy!! Also, feel free to try my cookie recipe, we love it at our house!
Sunday, June 27, 2010
Freebie Alpha!
The other evening I was working on a water-themed poster for my next library display. I was very very disappointed with the "water" alphas I found online, so I made my own. Here it is:
The alpha has upper case, lower case and some of the basic punctuation symbols. Also a few splashes of water that I used as the period on my poster's sentence. Hope you enjoy them. You may use them for commercial or personal use.
Download here.
The alpha has upper case, lower case and some of the basic punctuation symbols. Also a few splashes of water that I used as the period on my poster's sentence. Hope you enjoy them. You may use them for commercial or personal use.
Download here.
Friday, June 11, 2010
A fun idea for a page
I am trying very hard to catch up on my traditional books. I am working right now on last summer's trip to Nebraska. I had so many great pictures (I took pictures, both of my sisters took pictures and my niece took pictures), but only wanted to do 1 2-page layout, also, some of my sister's pictures were pixelated when I printed them. So I chose the best pictures and had to scrap the rest. But now that I'm almost done, I needed a space filler. The title of the page is simply "Nebraska" so I came up with the idea of using an outline of Nebraska as a frame for a picture collage. This is what I came up with:
I cropped the pictures tight and tried to get as many in as possible. Then I use simple white lines to outline them. I then used my photo editor's instant effect option to great an embossed look on the white lines and the black outline of the state. I really like it. I'll cut it out and mat it in paper matching the rest of the NE layout. I will post it when I finish.
Monday, April 26, 2010
Have a Daisy Day!
Here is a preview of a card I made for a Girl Scout page. Do you like it? Go to my other blog, Daisy Chains Mom to download it!
Journal Card Overlay Freebie!
Hi all! I have been working hard on getting my traditional scrapbooks up to date, and is it hard! I'm working right now on a self-portrait layout. It has been interesting to say the least. I had bought some little journal cards at the scrapbook store for this layout but they were on a yellowish card stock, and that didn't work with my color scheme. I used the purchased cards as an inspiration for these overlays. I tweaked them to reflect my personality a little more as well. They can be put onto blank card, paper or tag .pngs or you could print them onto paper and use in a traditional book. I hope you like them.
Please leave me some love if you download them!
Click here to download!
Please leave me some love if you download them!
Click here to download!
Saturday, April 17, 2010
Brainstorm of the century!!!
Okay, so as you all know, I'm a traditional scrapper as well as a digiscrapper. I'm pretty current on my girls' books, which are digital, but I've let myself get behind on my traditional book, the one I keep for myself. Right now I am working on a layout from last summer's 4th of July. I was really impressed with myself when I decided to try sewing my pictures onto their matting, and then I was really pleased when I tried adding some star shaped sequins. It all turned out so cute! Then I sewed large arcs onto the background, finishing each one off with a mix of sequin stars, hoping for a whole "fireworks" appearance. The next big idea was that I took 1 inch plastic letters to and added rhinestones in red, white and blue. Thank you tons to my friend, Raynette, who told me to go buy stickles to fill in the gaps. It turned out soooo cute! But I was stumped for what to add to the layout to give it a finished look. I considered the torn box from sparklers, but it didn't work for me. I then thought of using black cat fireworks to add a really authentic pop (pardon the pun) to the page, but I was honestly worried about the black powder in my book. I'm not super particular about acid-free, but I don't want my book to explode if it gets slammed shut! So tonight I realized, why not make my own fireworks?? Here's the result, what do you think??
I cut red paper into strips about 4 inches long and 1 inch wide. Then I rolled them around a hemp cord "fuse" and finished it off with double-sided tape. I think they look great, here are the layout pages:
Sunday, April 11, 2010
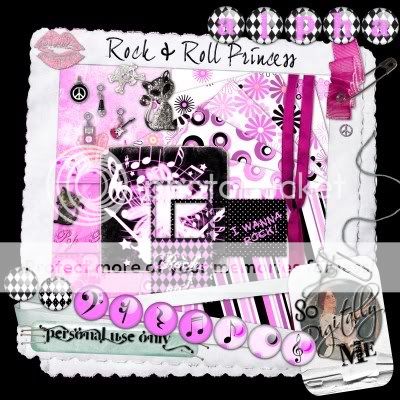
Rock and Roll Princess Freebie!
I originally set out to make this set as a Rock and Roll Christmas -- to use with pictures of my daughter discovering her guitar left for her by Santa this year. But as it turns out, the pink worked much better and I love it! I have included:
10 coordinated papers (300dpi 12x12)
9 coordinated brads
13 random elements -- bling, ribbon, frames
Alpha - includes 26 letters, 10 numbers and ? !
Download HERE.
Please feel free to leave me some love, and if you would send me the layouts you make with it, I'll post them for others to see!
10 coordinated papers (300dpi 12x12)
9 coordinated brads
13 random elements -- bling, ribbon, frames
Alpha - includes 26 letters, 10 numbers and ? !
Download HERE.
Please feel free to leave me some love, and if you would send me the layouts you make with it, I'll post them for others to see!
Friday, March 12, 2010
Cousins WordArt Freebie!
I'm sorry for being such a terrible blogger. I don't post often enough, but at least I can offer you a freebie today to make up for it. I have some great pictures of my girls with their cousins but I can never find good "cousin" quotes. Here is one that I LOVE! I used pink so it would show up on the black blog, the downloaded file is transparent.
Click here to download the .png file.
Wednesday, January 6, 2010
Zoo QP & Felt Alpha Freebie!
Please click here to download.
I needed a really cute page for the pictures from our trip to the Omaha Zoo in October of last year (can't believe I'm saying that about 2009!) I created this QP and the matching felt alpha -- there are 7 color variations -- to share. Please enjoy!
Subscribe to:
Posts (Atom)